
Facial masks are a cosmetic product that occasionally use to complement the daily beauty ritual easily. For their benefits to be significant, you have to look for what best suits each skin type.
Facial masks contain the necessary active ingredients to help improve facial dermis.
Table of Contents
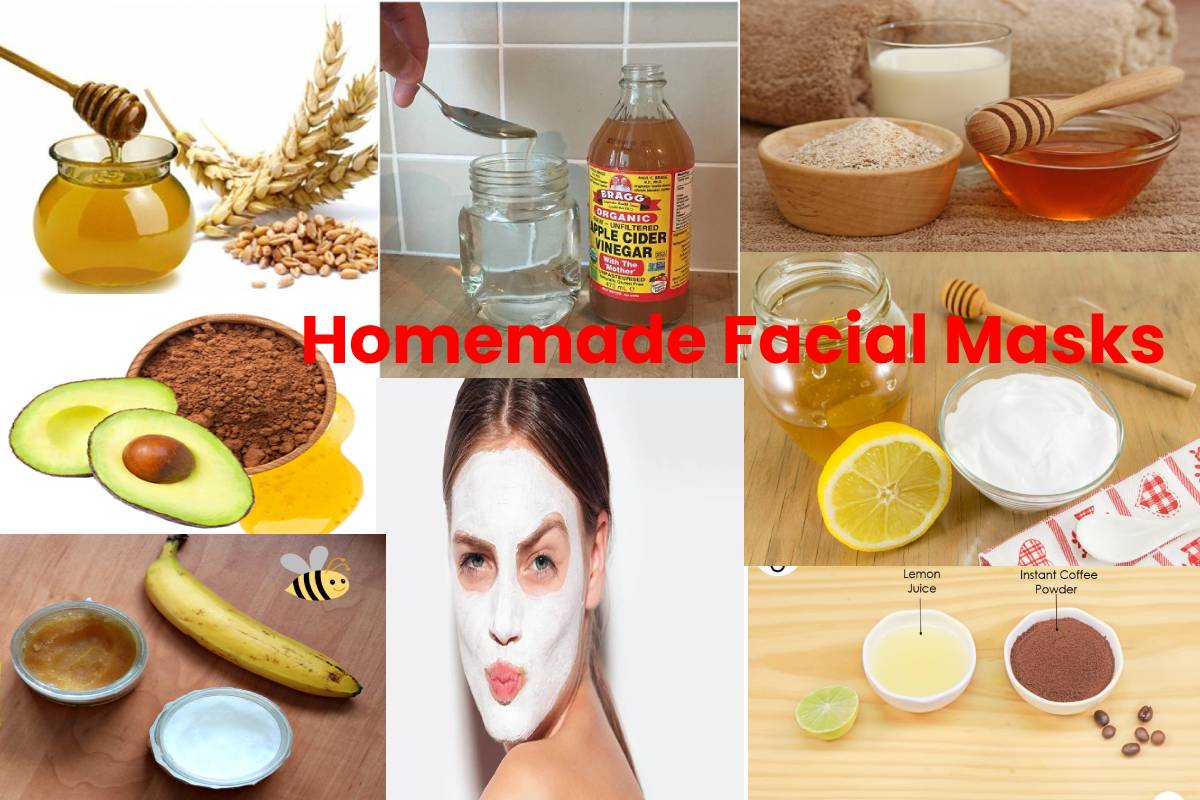
Here 8 Easily Homemade Facial Masks
1. Rejuvenating Mask
Ingredients
- Coffee, honey, and half a lemon
Preparation and Application
- Mix a little coffee with a tablespoon of honey and then help yourself with half a lemon, apply the mixture all over the face.
- Leave it on for 10 minutes and rinse with warm water. It can do about twice a week, and at night, sun exposure can cause spots on the skin.
Benefits
- This mask reactivates blood circulation, cleanses, hydrates, and exfoliates the skin and helps it look younger.
2. Anti-Wrinkle Mask for Dry Skin
Ingredients
- 1 tablespoon of whole wheat or regular flour, 1 tablespoon of milk, and 1 tablespoon of honey.
Preparation and Application
- You have to mix the three ingredients very well until a homogeneous mixture is left and apply it with a brush’s help on the face.
- As with any mask, we will avoid the area around the eyes and lips as they are the most sensitive areas.
- Apply for 15 to 20 minutes until it has dried and rinse with warm water.
Benefits
- It helps reduce wrinkles, hydrates, and nourishes dry skin.
3. Mask to Reduce Skin Blemishes
Ingredients
- 3 tablespoons of red wine and 3 tablespoons of honey.
Preparation and Application
- Mix both ingredients well and apply the mixture on the face. You can also use it after putting it in the fridge for several minutes.
- You can use it between three or four times a week.
Benefits
- Prevents wrinkles, blemishes, is an antioxidant, exfoliates, and removes dead cells.
4. Mask for Skin with Acne
Ingredients
- 1 tablespoon of Bicarbonate, 1 tablespoon honey, cinnamon, and a few drops of lemon.
Preparation and Application
- Mix well all the ingredients and apply the mask, especially in the face’s fattest areas. But before using it, try applying just a little to some extent of the neck, to be sure.
- It does not cause any reaction since lemon and Bicarbonate are vital ingredients.
- Always apply it at night, since with sunlight, the lemon could generate spots, o4enly about 10 or 15 minutes and once every 10 days or every month.
- Then wash with warm water and apply your moisturizing creams and serums.
Benefits
- It eliminates dead cells and excess oil in the pores.
5. Mask to Reduce Pimples and Redness
Ingredients
- 1 tablespoon of apple cider vinegar and 2 tablespoons of water.
Preparation and Application
- We will apply this mixture as a toner and not as a mask.
- You will only have to mix the ingredients and soak a cotton pad to use it to the face with soft touches.
Benefits
- Eliminates impurities, exfoliates the skin, reduces pimples, and soothes redness. Do not use it if you have susceptible skin, as the vinegar could irritate it.
6. Mask to Remove Blackheads
Ingredients
- Egg white and paper napkins
Preparation and Application
- Separate the white of an egg and apply it with a brush’s help.
- Then place the pieces of paper all over the face as a mask, and using a lighter on top, they stick together.
- Wait about 10 minutes for it to dry and remove it very carefully.
Benefits
- Exfoliates the skin, removing blackheads and impurities
7. Wrinkles Mask
Ingredients
- 2 avocados, 1 tbsp. Raw honey, And also 2 tbsp. cocoa powder
Preparation and Application
- Avocados mash in a bowl and then add the cocoa powder and honey. Gently massage the mask over your face.
- Let it for 20 minutes and then wash off with warm water.
Benefits
- It can reduce the appearance of fine lines and wrinkles and promote tighter, firmer skin.
8. Oily Skin Mask
Ingredients
- Banana, And also 10 drops lemon juice, 1 tsp. olive oil
Preparation and Application
- Banana mash in a bowl, add the lemon juice, and olive oil to make a liquid paste.
- Apply this mask over your face. Let it for 15 minutes and then wash off with warm water.
Benefits
- It can clog pores, triggering acne and inflammation.
What are the Benefits of Facial Masks?
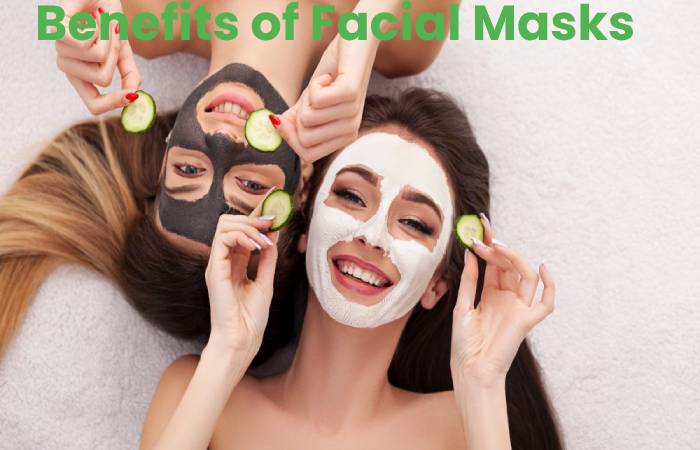
- A facial mask can refill and moisturize your skin. These are effective treatments because the ingredients can set on your skin for 10 to 30 minutes.
- The nutrients and vitamins penetrate your skin, deep clean your pores, and remove the outer layer of dead skin. Facial masks can do cleanse, tighten, exfoliate, soften, and brighten the skin.
- If you don’t have in to whip up a homemade mask, and over peel-off mask is cheaper than going to a spa, too.
- And also, a rinse-off mask involves removal with a warm or cold cloth once the dries. And also, peel-off masks are gel-form for deep cleansing and exfoliating. You’ll also apply the mask, wait for it to set, and then peel off.
- There’s also the choice of a sheet mask. Rather than applying a cream or gel, you’ll place a facial sheet (containing nutrients and minerals) over your face.
How to Apply the Facial Mask?
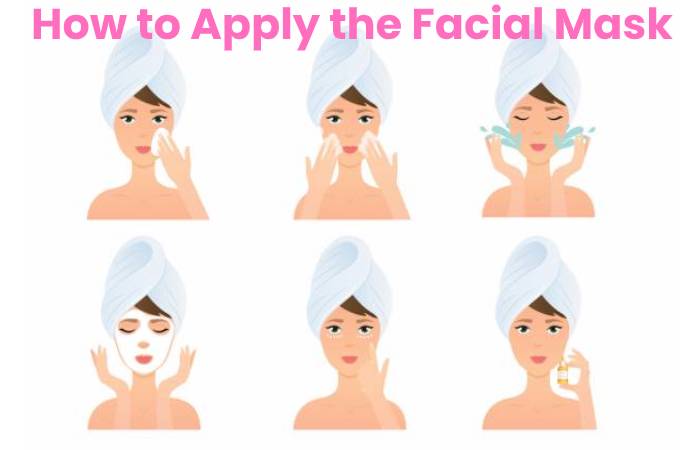
If you have decided to introduce the facial mask in your beauty ritual, you must take note of how to do it:
- Although it is evident, do not forget to gather your hair well to clear the face and neck.
- Before the mask applies, the skin must be clean and exfoliated to absorb the product better.
- Once this step does, the mask is applied gently with the fingertips, tapping, and not sliding.
- It is always advisable to start spreading it down the forehead, avoiding the area around the eyes and eyelids as it is a very delicate area.
- Continue applying to the cheekbones, cheeks, nose, and upper lip but without forgetting the neck, since it is an area that also needs to be cleaned and hydrated.
- It is ideal for applying the mask at some time of the day in which we have enough free time since it should be left to act between 20-30 minutes until it is scorched.
- Once the relaxation time has elapsed, the product must remove.
- And also, to do this, you should take a cotton ball or a damp towel and gradually release the product, ending with a wash of the skin with warm water to remove the remains.
- Finally, you have to dry the skin and use a toner to close the pores, achieving a clean and revitalized skin.
However! If you want your skin, in addition to being clean and without impurities, to be fully hydrated, use a moisturizer for daily use.
Conclusion
A regular skincare routine can improve your complexion, fight acne, and control illness. But don’t believe you need a fancy spa to get great results.
Using your kitchen ingredients, you can make homemade facial masks and give your face the nourishment and moisture it needs.